 Did you know that there are Rules of Cuteness? Okay, I like to think of them as guidelines but you can check out some of them here: http://cuteoverload.com/tag/the-rules-of-cuteness/ Still with me? I hope you didn't get too distracted by all the cuteness! Here is a step-by-step tutorial on making a cute little fondant bear. You will need:
 - Dark Brown Fondant
- Light Brown Fondant (small amount for ears, paws, tummy)
- White Fondant (small amount for eyes)
- Black Fondant or Food-Safe Black Marker (to make eye pupils)
- Small amount of water and a paintbrush
- Toothpick or paring knife
 Step 1: Take a little less than half of the brown fondant and roll into a ball. Make it slightly wider than it is tall. Make two little balls for ears. Remember - small ears are cute!
  Step 2:
 To attach ears (or anything), dip paintbrush in water and then wipe almost all water off the brush. Dab a tiny amount of water onto fondant surface and stick ears on. Roll out a small ball of light brown for the muzzle. Tap with finger to flatten or use a smooth jar to roll out. Attach with water.
 Step 3:
 Flatten two tiny light brown balls for the inside of the ears and attach with water. Roll tiny amount of black fondant and squish on for a nose. Take tip of a knife or a toothpick and make the mouth. See how my mouth is lop-sided and close to the nose? Cute!
 Step 4:
 Step 4:
 Roll two small balls for the eyes and flatten them. Place them wide apart for maximum cuteness. You also want them fairly large in proportion to the rest of the face so play around a bit until you're happy with them.
 Step 5:
 Step 6:
 Step 5:
 Flatten two balls of black for the pupils and attach them. I decided to make my bear a little more smiley, too. The head is done!
 Step 6:
 For the body, roll out a brown ball that is slightly smaller than the head and taller than it is wide. You will also need a small amount of light brown fondant for the tummy part.
 Step 7:
 Step 7:
 Flatten the light brown ball (a rolling device does come in handy here) and attach to the torso with water.
 Step 8:
 Step 8:
 Roll four balls for the limbs. Here's a tip for making balls of the same size: take one ball of fondant and break in half then break those in half. It's more accurate than trying to break one ball into four equal parts.
 Step 9:
 Step 9:
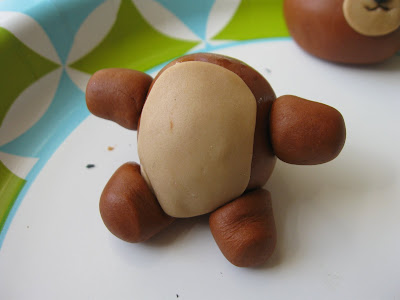
 Squish you balls into elongated jelly bean shapes. Don't make them too long and skinny, though, because...yes, stubby arms and legs are cute!
 Step 10:
 Step 10:
 Attach legs and arms with small amount of water. Don't be afraid to really squish them on. You might end up with little wrinkles but that's okay, in this case. It is NOT cute when your bear's leg falls off!
 Step 11:
 Step 11:
 Make 4 small light brown balls for paws. Flatten slightly and attach.
 Step 12:
 Step 12:
 Attach the head using a little water again. You may want to support him against something while he dries. Or, if you're worried that the head will fall off, you could put a toothpick through the body for support and then stick the head on that.


