 |
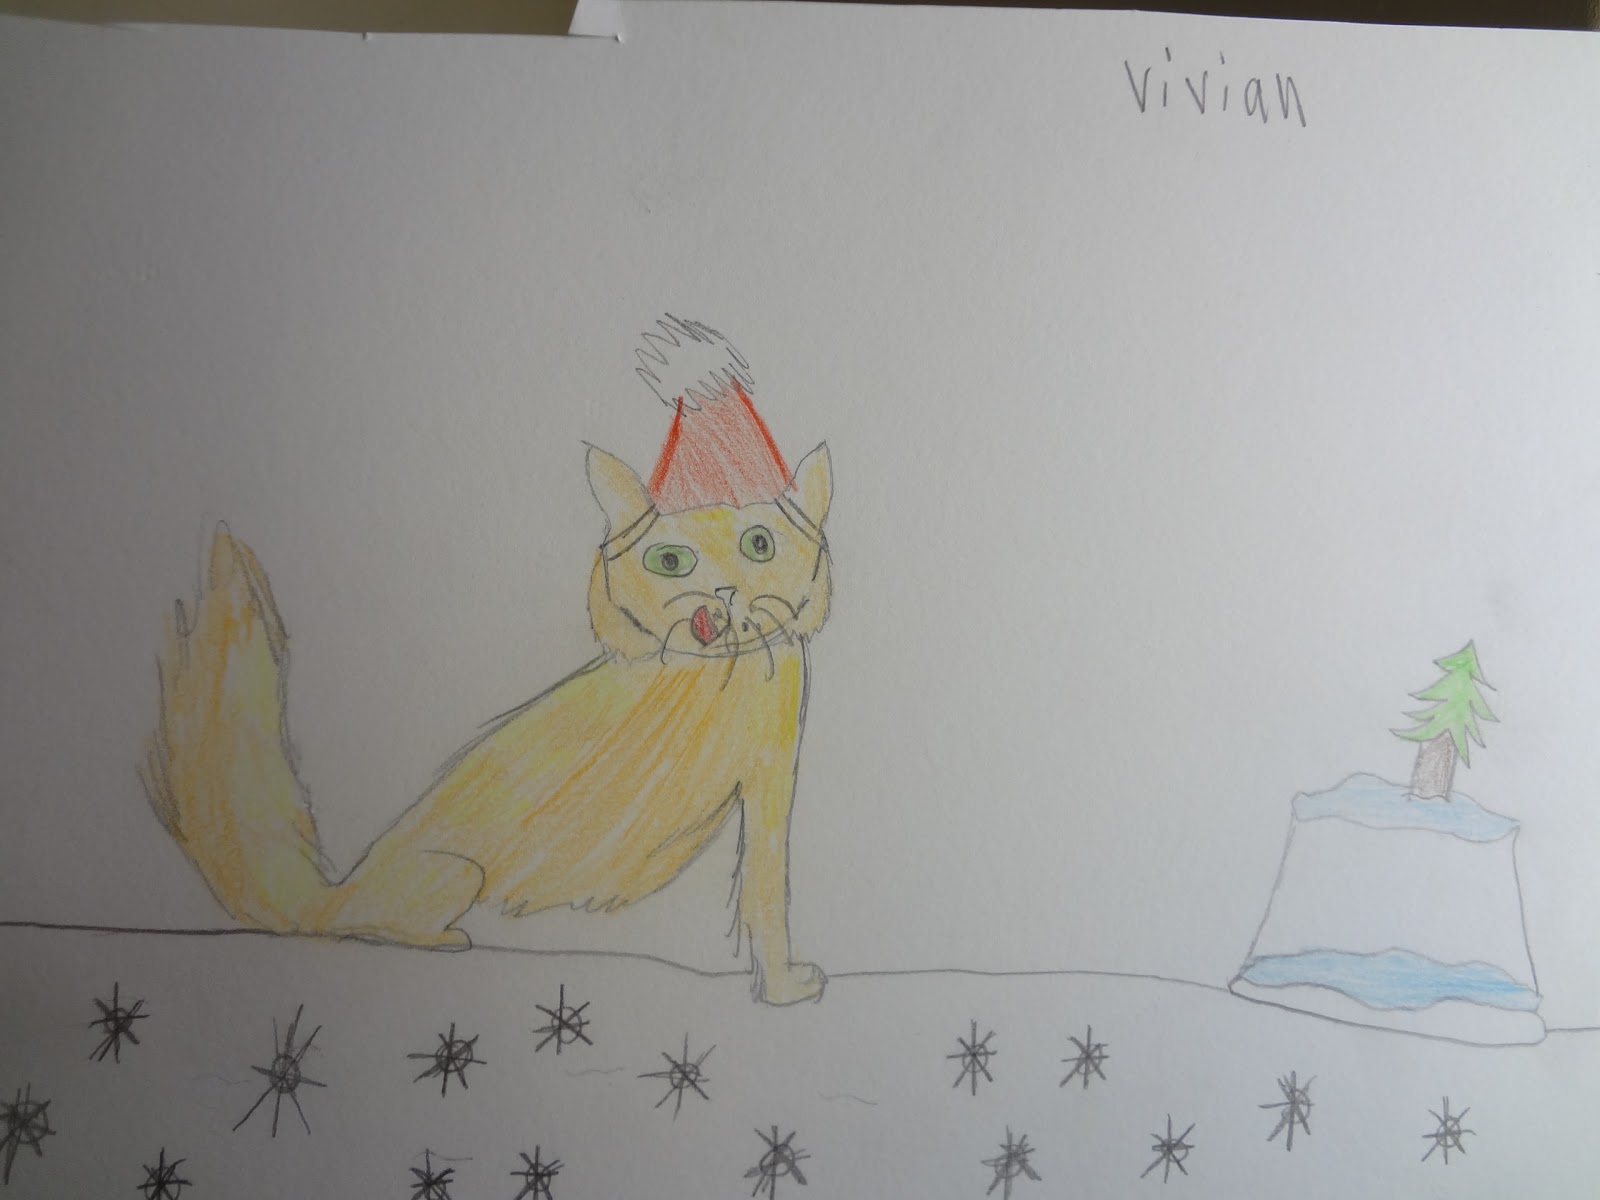
| Well, we are winding down the holiday season! Here's a great portrait of Simon drawn by my young friend, Vivian. I think she captured his true self - smacking his lips after eating some forbidden holiday cake! |
Sunday, December 30, 2012
Simon's Portrait
Tuesday, December 25, 2012
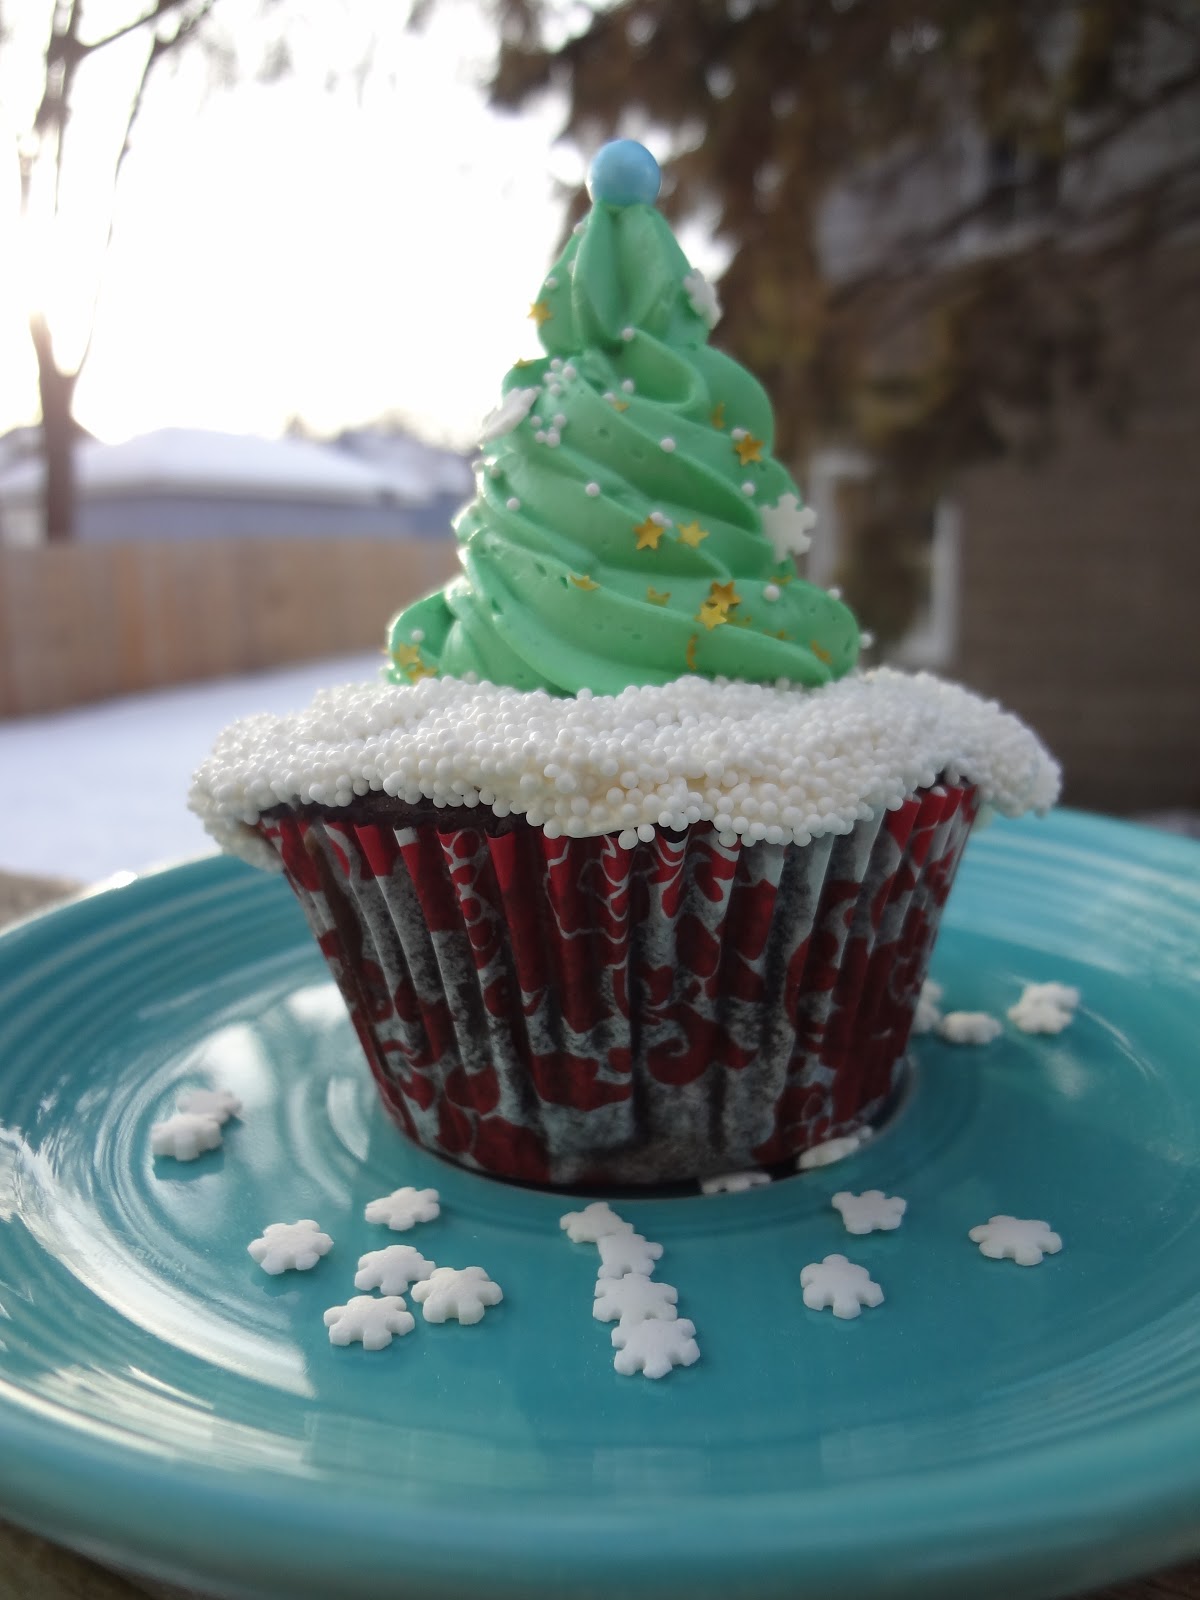
Christmas Tree Cupcakes
Merry Christmas!
I made these cupcakes for a friend over the weekend. They are plain chocolate cupcakes with vanilla wiss buttercream frosting. You could use another frosting, of course, but make sure it is not too soft or your trees will slouch and look all lumpy.
First I made the snow by piping a ring of white frosting around the edges of the cupcake and dipping it in white nonpareil sprinkles. You could use coconut instead. Don't worry if it's lumpy. It just adds to the "snowbank" effect.
Next, using a star tip, pipe the tree by piling the green frosting in a tight circle. Decorate your tree using whatever strikes your fancy. I used more nonpareils, some snowflake sprinkles, some beautiful edible gold star sprinkles and a blue ball on top.


Sunday, December 23, 2012
Holiday Decorations - Minneapolis and Saint Paul
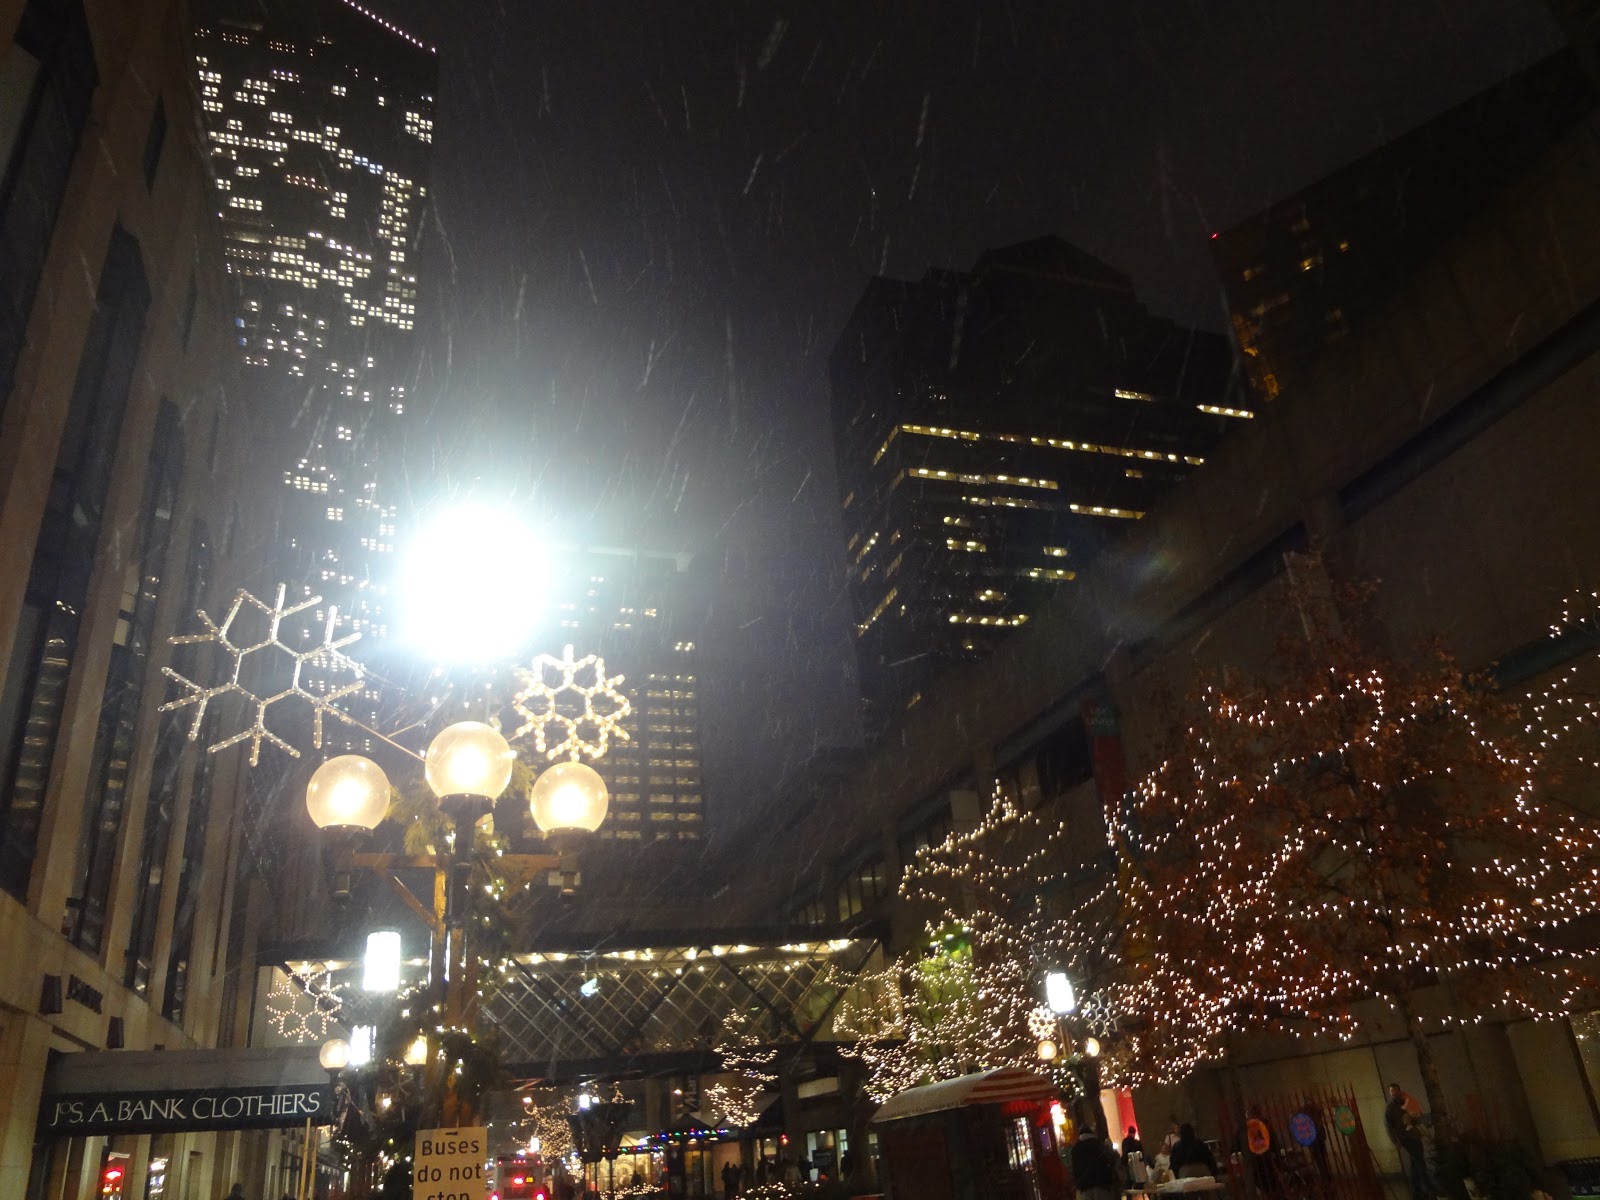 |
| Nicollet Mall & Sixth Street |
 |
| The view from my bus stop - 6th St & Nicollet Mall |
 |
| Rice Park in Saint Paul - View of the Landmark Center |
 |
| Decorations in Rice Park |
 |
| Rice Park - the lights are to call attention to a night of live music at the skating rink at the Landmark Center. |
 |
| Decorations in Rice Park |
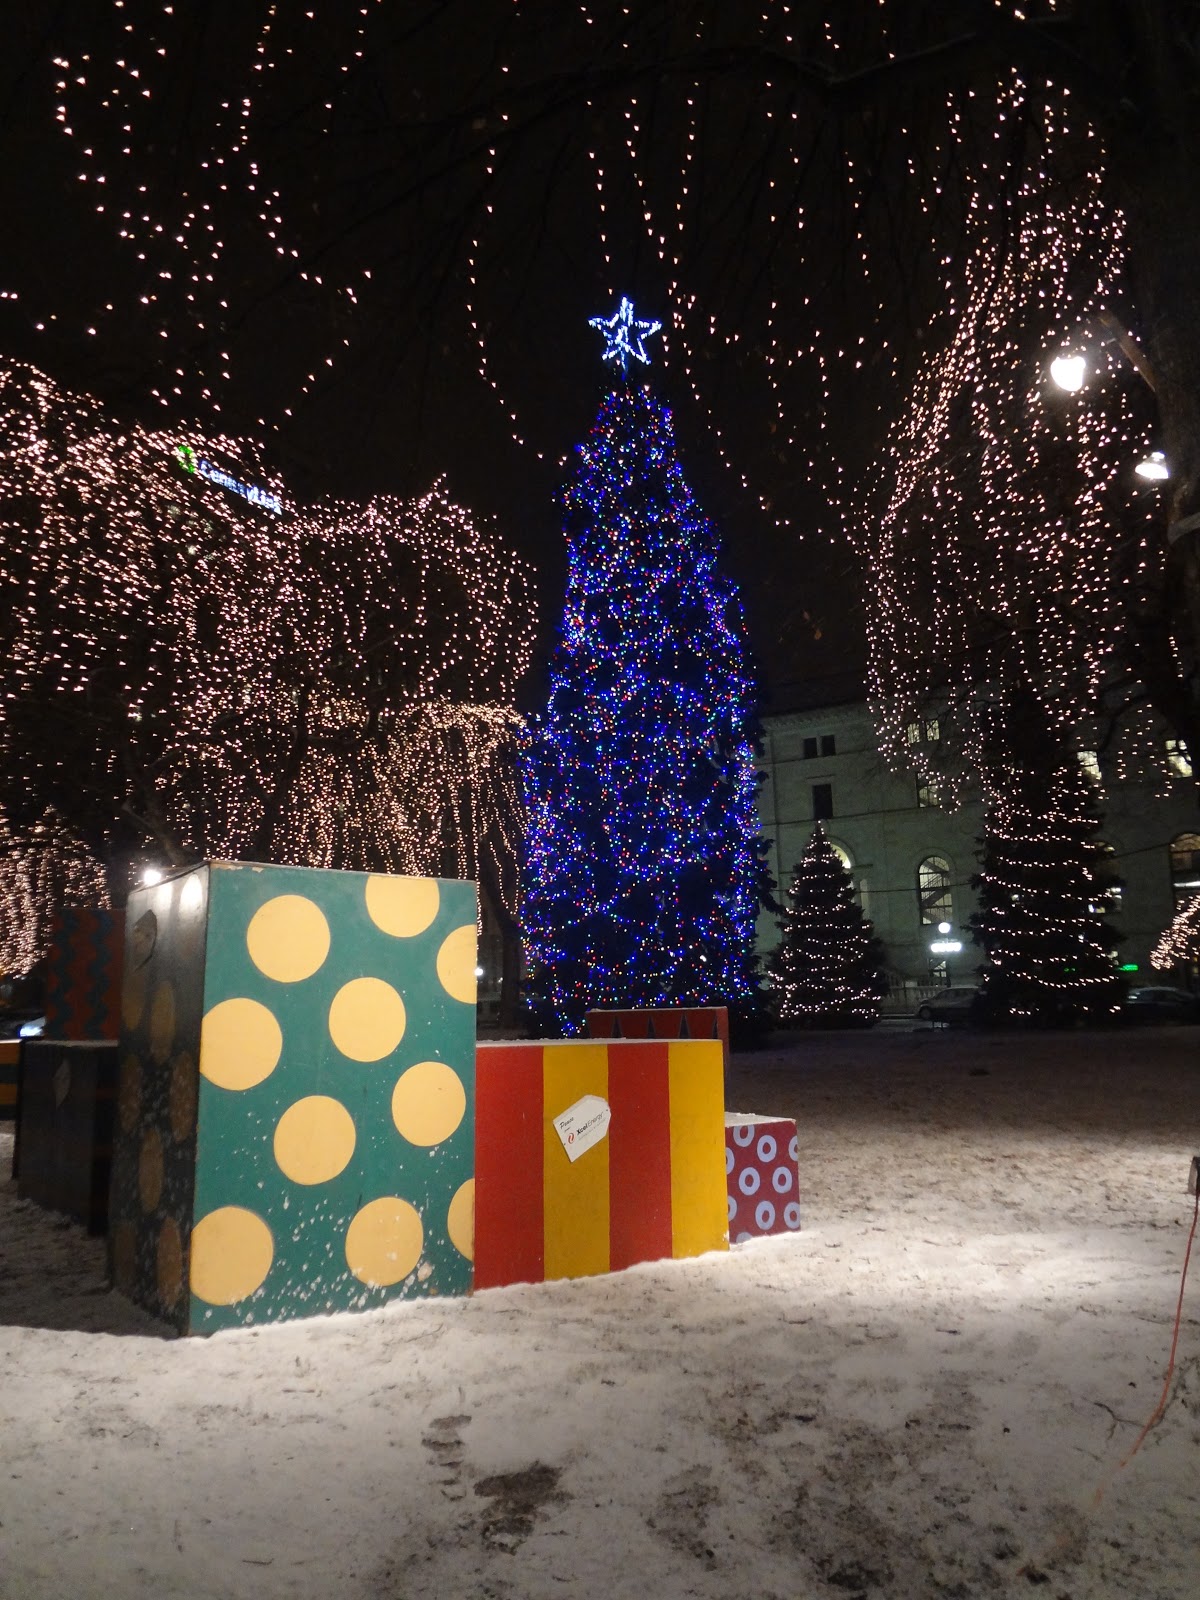 |
| Decorations in Rice Park |
 |
| Decorations on the Lawson building - 5th Street and St. Peter in St. Paul. |
Christmas Cookies
Traditionally, my family decorates peanut butter cookies for Christmas. I don't know why we don't decorate sugar cookies; I guess I should ask my mom :)
For these cookies, use the full-fat, salty peanut butter like Jif or Skippy. Natural peanut butter or low-salt will not work well. You may need to add some flour while rolling out the dough. We decorate with a simple buttercream (butter, powdered sugar, vanilla and salt beaten together).
Peanut Butter Cookies
1 cup creamy peanut butter
2 sticks unsalted butter, softened
1 cup granulated sugar
1 cup brown sugar
2 eggs
2 tsp vanilla
1 tsp baking powder
2 1/2 cups flour


 |
| Add caption |
For these cookies, use the full-fat, salty peanut butter like Jif or Skippy. Natural peanut butter or low-salt will not work well. You may need to add some flour while rolling out the dough. We decorate with a simple buttercream (butter, powdered sugar, vanilla and salt beaten together).
Peanut Butter Cookies
1 cup creamy peanut butter
2 sticks unsalted butter, softened
1 cup granulated sugar
1 cup brown sugar
2 eggs
2 tsp vanilla
1 tsp baking powder
2 1/2 cups flour
- Cream together peanut butter, butter and sugars.
- Add eggs one at a time. Add vanilla.
- Whisk dry ingredients together in a medium bowl. Add to wet mixture until well-combined.
- Refrigerate dough for atleast an hour before rolling out.
- Roll out dough about 1/4 inch thick and cut shapes. Bake at 350F until edges of cookies are browned.
 |
| Some of these cookies are upside down. Can you spot a snowman and a Christmas tree? How about a psychedelic flower? |


 |
| My sister made this fox from a star cookie! |
Saturday, December 22, 2012
Easy Ginger Cookies

I made these chewy cookies last week - on a weeknight! That's how easy these come together. Normally, I don't do a ton of baking during the week because I have very limited time after work (and enjoy my beauty sleep). What's great about these cookies is that, unlike a lot of cookie recipes, the dough does not need to be refrigerated before baking. I modified the recipe at the link below by adding a teaspoon of ground ginger, reducing the nutmeg to 1/4 teaspoon and rolling the dough in turbinado sugar instead of regular white sugar. I love the crunch of the turbinado! These cookies keep quite well for several days as long as you keep them in an airtight container.
http://www.marthastewart.com/341117/chewy-molasses-spice-cookies

Tuesday, December 18, 2012


Sunday, December 16, 2012
Recycled Paper Snowflakes

Did you make paper snowflakes when you were a kid? I don't really remember making them but I'm pretty sure we only had those crappy safety scissors with rounded tips (except my mom's sewing scissors which were absolutely off limits, as I recall). Anywho, every time I've tried to make them as an adult they've never really turned out right.
I decided to give it another whirl this year and made these snowflakes out of old magazines. I have LOTS of old magazines and might have a slight magazine-hoarding problem. I have issues (get it? "issues"!). I made four snowflakes from each page and strung them on embroidery floss. These are very simple to make but take time. You can make them while watching tv!
If you need a little help, here's a link with some snowflake patterns:
http://www.designingmyho.me/pt/?id=29420

Thursday, December 13, 2012
Winter Cupcake Decoration

http://cstandsforcarrie.blogspot.com/2011/12/hunt-and-cut-2011.html


Monday, December 10, 2012


Sunday, December 9, 2012
Decorations Downtown Minneapolis
 |
| Gaviidae Commons |
 |
| Downtown Target Atrium |
 |
| Lobby of the Wells Fargo building |
 |
| US Bank Building - live music in the lobby |
Tuesday, December 4, 2012
Orange Cranberry Cake

Cranberries are in the stores! I grew up in Cranberry Land (aka southeastern Massachusetts) so cranberries are a required ingredient for the holidays. I often buy a bag with no real purpose in mind. They never go to waste!
I made this dense cranberry cake (a coffe cake type of cake) for a brunch that I hosted. It was delicious - not too sweet and plenty moist, with a crunchy sugar coating baked on top. The only changes I made to the recipe in the link below is that I added a teaspoon of almond extract and added about a quarter cup of additonal sugar to the batter.
http://www.unegaminedanslacuisine.com/2012/11/cranberry-buttermilk-cake.html
Here is my rescue reindeer (found at a creepy estate sale, with no nose or antlers, and purchased for a quarter) having a taste. He gives it the North Pole Lick of Approval.

Tuesday, November 13, 2012
(Not Just) Another Carrot Cake!


Carrot Cake (adapted from Carrot Cake III from Allrecipes.com)
- 4 eggs (room temp)
- 1 cup vegetable oil
- 1 cup brown sugar
- 1 cup white sugar
- 2 tsp vanilla extract
- 1 tsp maple extract
- 1 tsp orange zest
- 2 cups all-purpose flour
- 1 1/2 tsp baking soda
- 1 1/2 tsp baking powder
- 1 tsp salt
- 2 tsp cinnamon
- 1 tsp ginger
- 1/4 tsp ground nutmeg
- 3 cups grated carrot
- 1/2 cup unsweetened coconut
- Preheat oven to 350F. Lightly spray two 8" baking pans with cooking spray and place parchment circles in bottoms. Alternatively, spray (or grease) pans and dust evenly with flour. Carrot cake is sticky.
- Combine first seven ingredients (up to the flour) in a mixing bowl. Beat together on low speed until combined.
- Sift together dry ingredients and then add to wet mixture. Or, if you hate sifting, put the dry ingredients in a mixing bowl and whisk them together vigorously. Beat wet and dry on low to medium speed until just combined (no dry spots but there could still be lumps)
- Fold/stir carrots and coconut into the batter using a spatula or rubber spoon, making sure that the carrots 'n' coconut mix is evenly distributed throughout.
- Immediately pour batter into pans. Bake about 30-40 minutes, rotating pan about halfway through. Check for doneness with a toothpick in center.
Tuesday, November 6, 2012
Skully


Monday, November 5, 2012

Skull and Spiderweb Cupcake Decorations

After melting my melts, I piped my design freehand on a piece of wax paper. You could easily slip some clip-art or another design under the paper as a guide. When it dries, carefully peel the decoration from the wax paper and top your cupcake! For the spiderweb one, I piped the web onto a pretzel stick for some height in the decoration. These were done quickly so are a little messy. With care, you can execute some pretty intricate designs.
Here is a website with illustrated instructions on making a piping cone from parchment paper.
http://www.fantes.com/parchment-triangles.html
This is what I use for piping small amounts of something for decoration instead of using a big ol' plastic piping bag.


Thursday, November 1, 2012
Another Witch Cupcake!

Despite signs to the contrary, I'm not really obsessed with witches. Oh, I like them just fine (old-fashioned scary ones) but I also like a a nice scary bat, a cute pumpkin, or a spooky ghost. It just worked out that I made a bunch of witch cupcakes this year.
These cupcakes were made by piping a big dollop of swiss meringue buttercream (dyed green) for the face. Height is important - don't make a squished witch face! Decorate the face with more buttercream and a green M&M for the nose. The hair is made of edible Easter grass (again - you could use licorice or strips of fruit roll-ups). The hat is made out of a Fudge Stripe cookie with chocolate ganache piped for the cone of the hat. The buckle on the hat is made from more buttercream frosting.
Making the ganache is easy - heat one cup of cream and pour over two cups of dark chocolate or semi-sweet chocolate chips. Let it sit for about 5 minutes then stir to melt all the chips. You will need to let the ganache cool to good piping consistenc - too warm and the hats will flop over but too cold and the hats won't pipe out of the bag.

Wednesday, October 31, 2012
Steampunk(ish) Costume

This year some of us decided to go "Steampunk" for Halloween. I don't know if I would say my costume is really authentic Steampunk (which is funny to say since it is a sort of made up time period) but I was pretty happy with the way it turned out. I am supposed to be a Steampunk Entymologist (bug scientist).

We did a little photo shoot at an abandoned building that had a kinda Old West facade. It used to be an antique store, I think, but it's falling apart now. You can see more of my costume here. My mom added the puffed sleeves to my shirt but most everything else I just bought at the thrift store. I made the "cincher" corset-type-thing from a paper bag and gold duct tape.

Here's a better picture of my hat. I made the form out of cardboard and covered it in wrinkly paper bag. Then I painted it, added some faux-leather trim, some packing tape with an insect pattern (found at Target in the office supply section) and some plastic insects I had "antiqued" with black and gold paint.

Below is a picture of my sister's costume, from the back. She's lucky because her hair looks cool without having to wear a wig! Isn't the tree awesome?


Here's a action shot of my brother-in-law above and one of my sister (Ma Barker style) below.

Subscribe to:
Posts (Atom)